

Building a File Upload API in Go
Creating a file upload API is a common requirement for many web applications that involve users submitting documents, images, or other media files. In this article, we will guide you through building a secure and efficient file upload API using Go with the Gin framework. You’ll learn how to set up your project, handle incoming files, and store them securely, ensuring that your application can reliably manage user-uploaded content.
Prerequisites
Go 1.21
Setup project
Setting up the Go project dependencies.
go mod init app
go get github.com/gin-gonic/gin
Project structure
├─ main.go
├─ models
│  └─ product.go
└─ public
   └─ index.html
Project files
product.go
The Product is a simple struct used for testing file uploads in our file upload API.
package models

type Product struct {
	Name string
}
main.go
This file sets up a file upload API. It will create and set up the minimal Go web application.
package main

import (
	"app/models"
	"io"
	"net/http"
	"os"
	"path/filepath"

	"github.com/gin-gonic/gin"
	"github.com/gin-gonic/gin/binding"
)

func main() {
	router := gin.Default()
	uploadPath := "./public/uploads"
	os.MkdirAll(uploadPath, os.ModePerm)
	router.Static("/uploads", uploadPath)
	router.StaticFile("/", "./public/index.html")
	router.POST("/submit", func(c *gin.Context) {
		var product models.Product
		if err := c.ShouldBindWith(&product, binding.FormMultipart); err != nil {
			c.AbortWithStatusJSON(http.StatusBadRequest, err.Error())
			return
		}
		image, _ := c.FormFile("Image")
		filePath := filepath.Join(uploadPath, image.Filename)
		src, _ := image.Open()
		dst, _ := os.Create(filePath)
		io.Copy(dst, src)
		c.JSON(http.StatusOK, gin.H{"Name": product.Name, "Image": image.Filename})
	})
	router.Run()
}
- Initializes a Gin router and sets up static file serving for the upload directory and index.html.
- Ensures the
./public/uploadsdirectory exists for storing uploaded files. - Defines a POST route at
/submitto handle file uploads, save the file to the server, and return the product's name and uploaded file name. - Starts the Gin server to listen for incoming requests.
index.html
This HTML form is designed for users to upload a product name along with an associated image file.
<!DOCTYPE html>
<head>
    <meta charset="utf-8">
    <meta name="viewport" content="width=device-width,initial-scale=1">
    <link href="https://cdnjs.cloudflare.com/ajax/libs/bootstrap/5.3.3/css/bootstrap.min.css" rel="stylesheet">
    <script>
        function submitForm() {
            let form = document.getElementById('form')
            let data = new FormData(form)
            fetch('submit', {
                method: 'POST',
                body: data
            }).then(res => {
                res.json().then(result => {
                    let alert = document.getElementById('alert')
                    alert.children[0].innerText = `Upload success!\nName: ${result.Name}\nImage: ${result.Image}`
                    alert.children[1].src = `/uploads/${result.Image}`
                    alert.classList.remove('d-none')
                    form.reset()
                })
            })
            return false
        }
    </script>
</head>
<body>
    <div class="container">
        <div class="row mt-3">
            <form id="form" onsubmit="return submitForm()">
                <div class="mb-3 col-12">
                    <label class="form-label" for="name">Name</label>
                    <input id="name" name="Name" class="form-control form-control-sm" required />
                </div>
                <div class="mb-3 col-12">
                    <label class="form-label" for="image">Image</label>
                    <input type="file" accept="image/*" id="image" name="Image" class="form-control form-control-sm" required />
                </div>
                </div>
                <div class="col-12">
                    <button class="btn btn-sm btn-primary">Submit</button>
                </div>
            </form>
            <div id="alert" class="alert alert-success mt-3 d-none">
                <p></p>
                <img id="img" width="200px" />
            </div>
        </div>
    </div>
</body>
</html>
The form is set to submit via a JavaScript function, submitForm(), which is triggered on form submission. Additionally, there is a hidden alert section that can display the uploaded image and a success message after submission successfully.
Run project
go run main.goOpen the web browser and goto http://localhost:8080
You will find this test page.
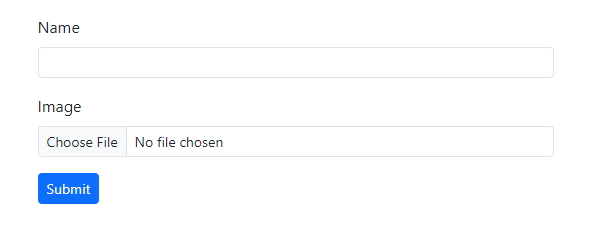
Testing
Enter the name in the input field and browse for a file to upload.
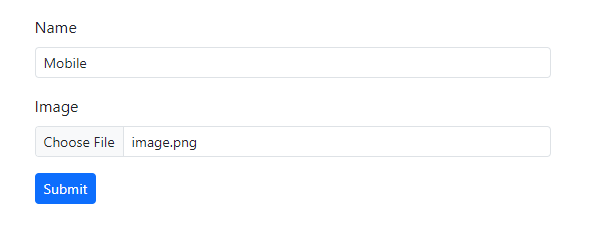
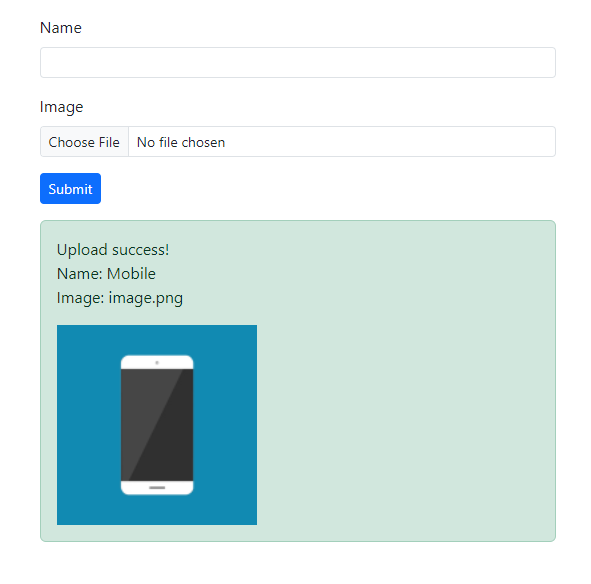
Click the submit button to send the form. You will then see a success message along with the submitted information returned from our API.
In essence, Go with the Gin framework streamlines the management of file uploads in web applications. By using a straightforward handler and form setup, you can efficiently handle file uploads and improve the user experience in your projects.
Source code: https://github.com/stackpuz/Example-File-Upload-Go
Create a CRUD Web App in Minutes: https://stackpuz.com