

Building a File Upload API in Spring Boot
Creating a file upload API is a common requirement for web applications that need users to submit documents, images, or other media files. In this article, we will guide you through building a secure and efficient file upload API using Spring Boot. You’ll learn how to set up your project, manage incoming files, and store them securely, ensuring your application can reliably handle user-uploaded content.
Prerequisites
- JAVA 17
- Maven
Project structure
├─ pom.xml
└─ src
   └─ main
      ├─ java
      │  └─ com
      │     └─ stackpuz
      │        └─ example
      │           ├─ App.java
      │           ├─ controller
      │           │  └─ UploadController.java
      │           └─ entity
      │              └─ Product.java
      └─ resources
         └─ static
            └─ index.html
Project files
pom.xml
This file contains the configuration and dependencies of the Maven project.
<?xml version="1.0" encoding="UTF-8"?>
<project xmlns="http://maven.apache.org/POM/4.0.0" xmlns:xsi="http://www.w3.org/2001/XMLSchema-instance"
	xsi:schemaLocation="http://maven.apache.org/POM/4.0.0 https://maven.apache.org/xsd/maven-4.0.0.xsd">
	<modelVersion>4.0.0</modelVersion>
	<groupId>com.stackpuz</groupId>
	<artifactId>example-file-upload</artifactId>
	<version>0.0.1-SNAPSHOT</version>
	<name>example-file-upload</name>
	<parent>
		<groupId>org.springframework.boot</groupId>
		<artifactId>spring-boot-starter-parent</artifactId>
		<version>3.0.10</version>
	</parent>
	<dependencies>
		<dependency>
			<groupId>org.springframework.boot</groupId>
			<artifactId>spring-boot-starter-web</artifactId>
		</dependency>
		<dependency>
			<groupId>org.springframework.boot</groupId>
			<artifactId>spring-boot-starter-data-jpa</artifactId>
		</dependency>
		<dependency>
	        <groupId>org.springframework.boot</groupId>
	        <artifactId>spring-boot-devtools</artifactId>
	    </dependency>
		<dependency>
			<groupId>org.projectlombok</groupId>
			<artifactId>lombok</artifactId>
		</dependency>
	   </dependencies>
</project>
App.java
This file is the main entry point for the Spring Boot application.
package com.stackpuz.example;

import org.springframework.boot.SpringApplication;
import org.springframework.boot.autoconfigure.SpringBootApplication;
import org.springframework.boot.autoconfigure.jdbc.DataSourceAutoConfiguration;

@SpringBootApplication(exclude = {DataSourceAutoConfiguration.class})
public class App {
	public static void main(String[] args) {
		SpringApplication.run(App.class, args);
	}
}
Since this sample project does not use a database, we disable the database configuration by excluding DataSourceAutoConfiguration.class
Product.java
The Product Entity is a simple class used for testing file uploads in our file upload API.
package com.stackpuz.example.entity;

import jakarta.persistence.Entity;
import lombok.Getter;
import lombok.NoArgsConstructor;
import lombok.Setter;

@Entity
@Getter
@Setter
@NoArgsConstructor
public class Product {

    private String name;

}
The Submit action accepts a Product Entity via a POST request. It checks if the uploads directory exists and creates it if necessary. The uploaded file is saved to this directory with its original name. Finally, the method returns a response with the product's name and the uploaded file's name.
UploadController.java
The UploadController.java handles file uploads in a Spring Boot application.
package com.stackpuz.example.controller;

import com.stackpuz.example.entity.Product;

import java.io.*;
import java.nio.file.*;
import java.util.*;

import org.springframework.web.bind.annotation.*;
import org.springframework.web.multipart.MultipartFile;

@RestController
public class UploadController {

    @PostMapping("/submit")
    public Map<String, String> submit(@RequestParam MultipartFile image, Product product) throws IOException {
        String uploadPath = "src/main/resources/static/uploads/";
        File uploadDir = new File(uploadPath);
        if (!uploadDir.exists()) {
            uploadDir.mkdirs();
        }
        String filename = image.getOriginalFilename();
        Path filePath = Paths.get(uploadPath + filename);
        Files.write(filePath, image.getBytes());
        Map<String, String> response = new HashMap<>();
        response.put("name", product.getName());
        response.put("image", filename);
        return response;
    }

}
It defines a /submit endpoint that accepts a MultipartFile (image) and a Product object. It saves the uploaded image to a specified directory /uploads and returns a response with the product's name and the image filename in a JSON format.
index.html
This HTML form is designed for users to upload a product name along with an associated image file.
<!DOCTYPE html>
<head>
    <meta charset="utf-8">
    <meta name="viewport" content="width=device-width,initial-scale=1">
    <link href="https://cdnjs.cloudflare.com/ajax/libs/bootstrap/5.3.3/css/bootstrap.min.css" rel="stylesheet">
    <script>
        function submitForm() {
            let form = document.getElementById('form')
            let data = new FormData(form)
            fetch('submit', {
                method: 'POST',
                body: data
            }).then(res => {
                res.json().then(result => {
                    setTimeout(() => {
                        let alert = document.getElementById('alert')
                        alert.children[0].innerText = `Upload success!\nName: ${result.name}\nImage: ${result.image}`
                        alert.children[1].src = `/uploads/${result.image}`
                        alert.classList.remove('d-none')
                        form.reset()
                    }, 1000) //Add a delay to confirm that the uploaded file is ready.
                })
            })
            return false
        }
    </script>
</head>
<body>
    <div class="container">
        <div class="row mt-3">
            <form id="form" onsubmit="return submitForm()">
                <div class="mb-3 col-12">
                    <label class="form-label" for="name">Name</label>
                    <input id="name" name="name" class="form-control form-control-sm" required />
                </div>
                <div class="mb-3 col-12">
                    <label class="form-label" for="image">Image</label>
                    <input type="file" accept="image/*" id="image" name="image" class="form-control form-control-sm" required />
                </div>
                </div>
                <div class="col-12">
                    <button class="btn btn-sm btn-primary">Submit</button>
                </div>
            </form>
            <div id="alert" class="alert alert-success mt-3 d-none">
                <p></p>
                <img id="img" width="200px" />
            </div>
        </div>
    </div>
</body>
</html>
The form is configured to submit through the submitForm() JavaScript function, which is called upon form submission. Additionally, a hidden alert section can show the uploaded image and a success message once the submission is successful.
Run project
mvn spring-boot:runOpen the web browser and goto http://localhost:8080
You will find this test page.
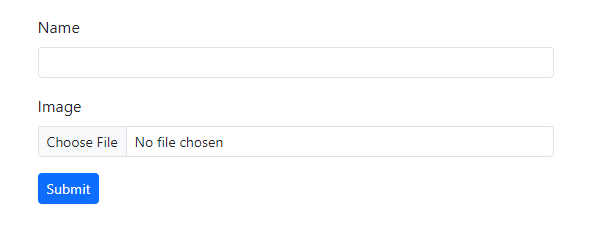
Testing
Enter the name in the input field and browse for a file to upload.
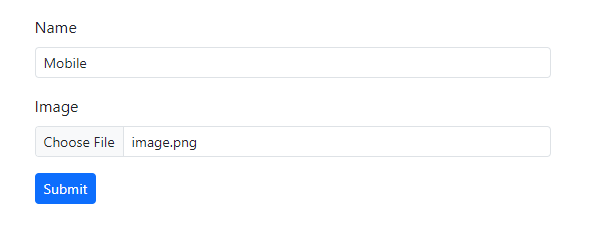
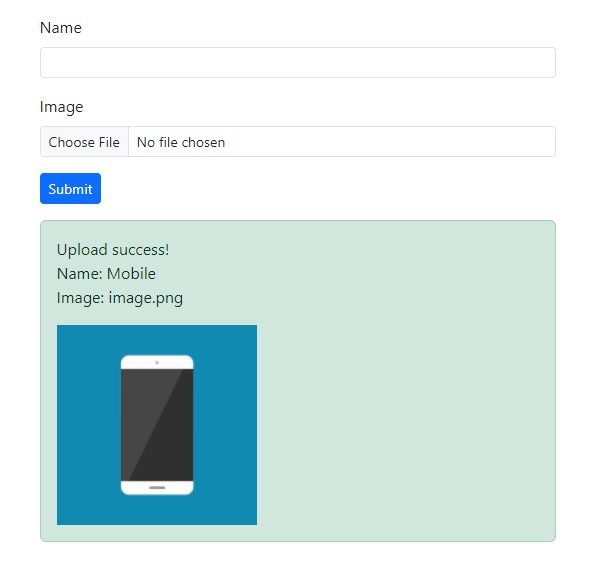
Click the submit button to send the form. You will then see a success message along with the submitted information returned from our API.
Conclusion
In essence, Spring Boot simplifies the management of file uploads in web applications. By utilizing a straightforward controller and form setup, you can efficiently handle file uploads and improve the overall user experience in your projects.
Source code: https://github.com/stackpuz/Example-File-Upload-Spring-Boot-3
Create a CRUD Web App in Minutes: https://stackpuz.com