Building a File Upload in FastAPI
Building a file upload API is a common need for web applications that manage user-submitted documents, images, or other media files. In this article, we'll walk you through creating a secure and efficient file upload system using FastAPI. You'll learn how to set up your project, handle incoming files, and store them securely, ensuring your application effectively manages user-uploaded content.
Prerequisites
- Python 3.10
Setup project
pip install fastapi uvicorn python-multipart
Project structure
└─ app
   ├─ __init__.py
   ├─ main.py
   ├─ schemas
   │  └─ product.py
   └─ static
      └─ index.html
__init__.py is used to mark the directory as a Python package.
Project files
product.py
from pydantic import BaseModel, Field
from fastapi import Form

class Product(BaseModel):
    name: str = Field(default=Form(None))
The product.py file defines a Pydantic model for handling form data, specifically for file uploads in a FastAPI application. The Form function is used to accept form data correctly.
main.py
import os
import uvicorn
from fastapi import FastAPI, File, UploadFile, Depends
from fastapi.responses import FileResponse
from fastapi.staticfiles import StaticFiles
from app.schemas.product import Product

app = FastAPI()

upload_path = "uploads"
os.makedirs(upload_path, exist_ok=True)
app.mount("/uploads", StaticFiles(directory=upload_path))

@app.get("/")
async def index():
    return FileResponse("app/static/index.html")

@app.post("/submit")
async def submit(image: UploadFile, product: Product = Depends(Product)):
    file_path = os.path.join(upload_path, image.filename)
    with open(file_path, "wb") as f:
        f.write(await image.read())
    return {
        "name": product.name,
        "image": image.filename
    }

if __name__ == "__main__":
    uvicorn.run(app, host="127.0.0.1")
The main.py file sets up a FastAPI application that handles file uploads and serves static files. It begins by creating an upload directory named uploads if it doesn't already exist, and it mounts this directory to serve uploaded files via the /uploads endpoint. The application defines two routes:
- The root route (
/) serves an HTML file located atapp/static/index.html, allowing users to access the front-end interface. - The
/submitroute accepts a file upload and a product name through a POST request. It saves the uploaded file to theuploadsdirectory and returns a JSON response containing the product name and the filename of the uploaded image.
index.html
<!DOCTYPE html>
<head>
    <meta charset="utf-8">
    <meta name="viewport" content="width=device-width,initial-scale=1">
    <link href="https://cdnjs.cloudflare.com/ajax/libs/bootstrap/5.3.3/css/bootstrap.min.css" rel="stylesheet">
    <script>
        function submitForm() {
            let form = document.getElementById('form')
            let data = new FormData(form)
            fetch('submit', {
                method: 'POST',
                body: data
            }).then(res => {
                res.json().then(result => {
                    let alert = document.getElementById('alert')
                    alert.children[0].innerText = `Upload success!\nName: ${result.name}\nImage: ${result.image}`
                    alert.children[1].src = `/uploads/${result.image}`
                    alert.classList.remove('d-none')
                    form.reset()
                })
            })
            return false
        }
    </script>
</head>
<body>
    <div class="container">
        <div class="row mt-3">
            <form id="form" onsubmit="return submitForm()">
                <div class="mb-3 col-12">
                    <label class="form-label" for="name">Name</label>
                    <input id="name" name="name" class="form-control form-control-sm" required />
                </div>
                <div class="mb-3 col-12">
                    <label class="form-label" for="image">Image</label>
                    <input type="file" accept="image/*" id="image" name="image" class="form-control form-control-sm" required />
                </div>
                </div>
                <div class="col-12">
                    <button class="btn btn-sm btn-primary">Submit</button>
                </div>
            </form>
            <div id="alert" class="alert alert-success mt-3 d-none">
                <p></p>
                <img id="img" width="200px" />
            </div>
        </div>
    </div>
</body>
</html>
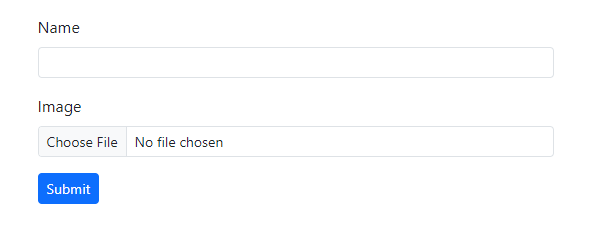
The index.html file serves as the user interface for a file upload feature in a FastAPI application. It includes a form where users can enter a name and select an image file for upload. Upon submission, a JavaScript function creates a FormData object and sends a POST request to the /submit endpoint. If the upload is successful, an alert is displayed with a success message and the uploaded image, allowing users to see their submission. The overall design focuses on providing a straightforward and functional experience for uploading files efficiently.
Run project
uvicorn app.main:app
Open the web browser and goto http://localhost:8000
You will find this test page.

Testing
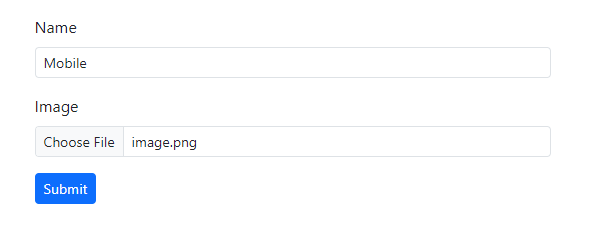
Enter the name in the input field and browse for a file to upload.

Click the submit button to send the form. You will then see a success message along with the submitted information returned from our API.

Conclusion
In essence, FastAPI simplifies the management of file uploads in web applications. With its intuitive handling of multipart form data and seamless integration of endpoints, you can efficiently manage file uploads while enhancing the user experience in your projects.
Source code: https://github.com/stackpuz/Example-File-Upload-FastAPI
Create a CRUD Web App in Minutes: https://stackpuz.com


