

Create a CRUD API with .NET
When working with a database, the CRUD operations (create, read, update, delete) are the basic functionality of any web application. This example will demonstrate the creation of a CRUD API with .NET and MySQL as a database.
Prerequisites
- .NET 8
- MySQL
Setup project
dotnet new webapi -o dotnet_api -n AppCreate a testing database named "example" and run the database.sql file to import the table and data.
Project structure
├─ Controllers
│  └─ ProductController.cs
├─ Models
│  ├─ DataContext.cs
│  └─ Product.cs
├─ wwwroot
│  └─ index.html
├─ Program.cs
├─ App.csproj
└─ appsettings.json
Project files
App.csproj
This file is the .NET project configuration file. We added the MySql.EntityFrameworkCore package here.
<Project Sdk="Microsoft.NET.Sdk.Web">
    <PropertyGroup>
        <TargetFramework>net8.0</TargetFramework>
        <ImplicitUsings>enable</ImplicitUsings>
    </PropertyGroup>
    <ItemGroup>
        <PackageReference Include="MySql.EntityFrameworkCore" Version="8.0.0" />
    </ItemGroup>
</Project>
appsettings.json
This is the .NET application configuration file that contains the database connection information.
{
    "Logging": {
        "LogLevel": {
            "Default": "Warning"
        }
    },
    "AllowedHosts": "*",
    "ConnectionStrings": {
        "Database": "server=localhost;port=3306;database=example;user id=root;password=;"
    }
}
Program.cs
This file is the main entry point for a .NET API application.
using Microsoft.EntityFrameworkCore;

var builder = WebApplication.CreateBuilder(args);
builder.Services.AddControllers();
builder.Services.AddDbContext<App.Models.DataContext>(options => options.UseMySQL(builder.Configuration.GetConnectionString("Database")));
var app = builder.Build();
app.UseDefaultFiles();
app.UseStaticFiles();
app.UseRouting();
app.MapControllers();
app.Run();app.UseDefaultFiles()uses index.html as the default HTML file.app.UseStaticFiles()serves the static files in the folder wwwroot.
DataContext.cs
This is the required file when working with Entity Framework (EF) in a .NET application. It's used to map the tables and columns information from the database to the entities.
using Microsoft.EntityFrameworkCore;

namespace App.Models
{
    public partial class DataContext : DbContext
    {
        public virtual DbSet<Product> Product { get; set; }

        public DataContext()
        {
        }

        public DataContext(DbContextOptions<DataContext> options) : base(options)
        {
        }

        protected override void OnConfiguring(DbContextOptionsBuilder optionsBuilder)
        {
        }

        protected override void OnModelCreating(ModelBuilder modelBuilder)
        {
            modelBuilder.Entity<Product>(entity =>
            {
                entity.ToTable("Product");
                entity.HasKey(e => e.Id);
                entity.Property(e => e.Id).HasColumnName("id");
                entity.Property(e => e.Name).HasColumnName("name").HasMaxLength(50).IsUnicode(false);
                entity.Property(e => e.Price).HasColumnName("price").HasColumnType("decimal(12,2)");
            });
        }
    }
}
Product.cs
This file defines the model information that maps to our database table named "Product".
using System.ComponentModel.DataAnnotations;

namespace App.Models
{
    public partial class Product
    {
        [Key]
        public int Id { get; set; }
        public string Name { get; set; }
        public decimal Price { get; set; }
    }
}
ProductController.cs
This file defines all functions required to handle incoming requests and perform any CRUD operations.
using Microsoft.EntityFrameworkCore;
using Microsoft.AspNetCore.Mvc;
using App.Models;

namespace App.Controllers
{
    public class ProductController : Controller
    {
        private readonly DataContext _context;

        public ProductController(DataContext context)
        {
            _context = context;
        }

        [HttpGet("api/products")]
        public async Task<IActionResult> Index()
        {
            var products = await _context.Product.ToListAsync();
            return Ok(products);
        }

        [HttpGet("api/products/{id}")]
        public async Task<IActionResult> Detail(int? id)
        {
            var product = await _context.Product.FirstOrDefaultAsync(e => e.Id == id);
            return Ok(product);
        }

        [HttpPost("api/products")]
        public async Task<IActionResult> Create([FromBody] Product model)
        {
            var product = new Product();
            product.Id = model.Id;
            product.Name = model.Name;
            product.Price = model.Price;
            _context.Add(product);
            await _context.SaveChangesAsync();
            return Ok(product);
        }

        [HttpPut("api/products/{id}")]
        public async Task<IActionResult> Update(int id, [FromBody] Product model)
        {
            var product = await _context.Product.FirstOrDefaultAsync(e => e.Id == id);
            product.Name = model.Name;
            product.Price = model.Price;
            await _context.SaveChangesAsync();
            return Ok(product);
        }

        [HttpDelete("api/products/{id}")]
        public async Task<IActionResult> Delete(int id)
        {
            var product = await _context.Product.FindAsync(id);
            _context.Product.Remove(product);
            await _context.SaveChangesAsync();
            return Ok();
        }
    }
}[FromBody]is use to parse the request boy into the model object.asyncandawaitwill help your .NET API handle more requests at the same time.- We utilize the
_contextto perform any CRUD operations on the database by using the basic CRUD methods such asFindAsync, Add, Remove, SaveChangesAsync
index.html
This file will be used to create a basic user interface for testing our API.
<!DOCTYPE html>
<head>
<style>
li {
margin-bottom: 5px;
}
textarea {
width: 100%;
}
</style>
</head>
<body>
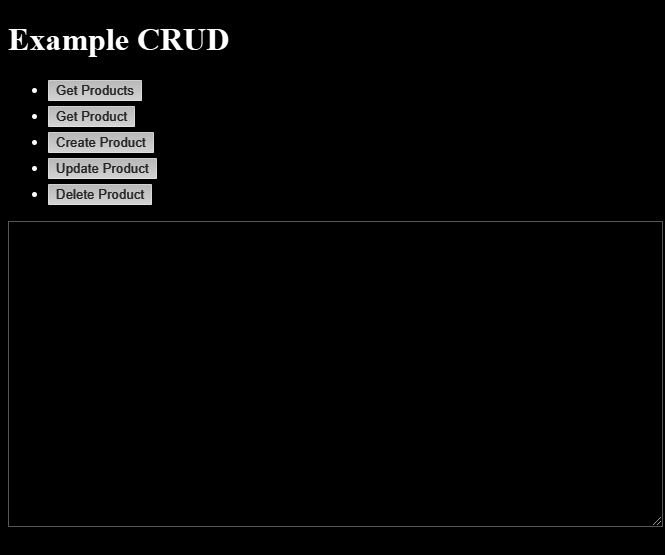
<h1>Example CRUD</h1>
<ul>
<li><button onclick="getProducts()">Get Products</button></li>
<li><button onclick="getProduct()">Get Product</button></li>
<li><button onclick="createProduct()">Create Product</button></li>
<li><button onclick="updateProduct()">Update Product</button></li>
<li><button onclick="deleteProduct()">Delete Product</button></li>
</ul>
<textarea id="text_response" rows="20"></textarea>
<script>
function showResponse(res) {
res.text().then(text => {
let contentType = res.headers.get('content-type')
if (contentType && contentType.startsWith('application/json')) {
text = JSON.stringify(JSON.parse(text), null, 4)
}
document.getElementById('text_response').innerHTML = text
})
}
function getProducts() {
fetch('/api/products').then(showResponse)
}
function getProduct() {
let id = prompt('Input product id')
fetch('/api/products/' + id).then(showResponse)
}
function createProduct() {
let name = prompt('Input product name')
let price = prompt('Input product price')
fetch('/api/products', {
method: 'POST',
headers: {
'Content-Type': 'application/json'
},
body: JSON.stringify({ name, price })
}).then(showResponse)
}
function updateProduct() {
let id = prompt('Input product id to update')
let name = prompt('Input new product name')
let price = prompt('Input new product price')
fetch('/api/products/' + id, {
method: 'PUT',
headers: {
'Content-Type': 'application/json'
},
body: JSON.stringify({ name, price })
}).then(showResponse)
}
function deleteProduct() {
let id = prompt('Input product id to delete')
fetch('/api/products/' + id, {
method: 'DELETE'
}).then(showResponse)
}
</script>
</body>
</html>- Many other articles will use Postman as the HTTP client to test the API, but in this article, I will use JavaScript instead. This will help you understand more details when working with HTTP request on the client-side.
- To keep this file is clean and readable, we will only use basic HTML and JavaScript. There are no additional libraries such as the CSS Framework or Axios here.
- All CRUD functions will use the appropriate HTTP method to invoke the API.
showResponse(res)will format the JSON object to make it easier to read.
Run project
dotnet runOpen the web browser and goto http://localhost:5122
Testing
Get All Products
Click the "Get Products" button. The API will return all products data.

Get Product By Id
Click the "Get Product" button and enter "1" for the product id. The API will return a product data.

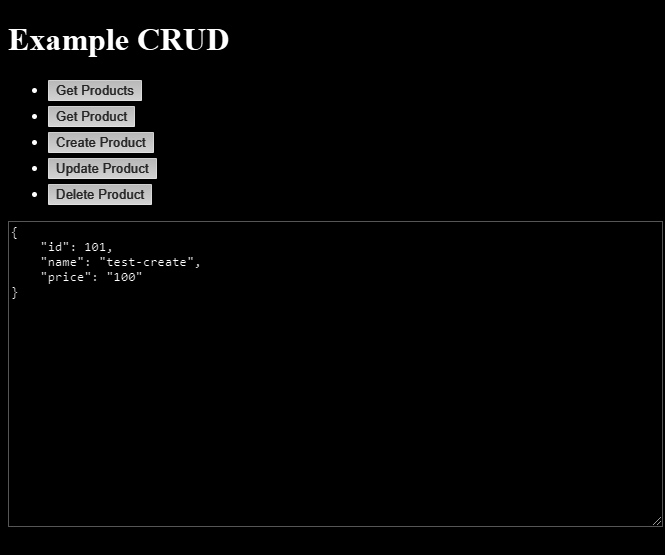
Create Product
Click the "Create Product" button and enter "test-create" for the product name and "100" for the price. The API will return a newly created product.
Update Product
Click the "Update Product" button and enter "101" for the product id and "test-update" for the name and "200" for the price. The API will return an updated product.

Delete Product
Click the "Delete Product" button and enter "101" for the product id. The API will return nothing, which is acceptable as we do not return anything from our API.
Conclusion
In this article, you have learned how to create and settings up the .NET application in order to create a CRUD API. Utilize Entity Framework as an ORM to perform the CRUD operations on the database. Test our API using JavaScript. I hope you will like the article, Thanks for reading.
Source code: https://github.com/stackpuz/Example-CRUD-dotnet-8
Create a CRUD Web App in Minutes: https://stackpuz.com