Create a CRUD API with Spring Boot
The CRUD operations (create, read, update, delete) are the basic functionality of any web application when working with a database. This example will show you how to create the CRUD API with Spring Boot and use MySQL as a database.
Prerequisites
- JAVA 17
- Maven
- MySQL
Setup project
Create a testing database named "example" and run the database.sql file to import the table and data.
Project structure
├─ pom.xml
└─ src
   └─ main
      ├─ java
      │  └─ com
      │     └─ stackpuz
      │        └─ example
      │           ├─ App.java
      │           ├─ controller
      │           │  └─ ProductController.java
      │           ├─ entity
      │           │  └─ Product.java
      │           ├─ repository
      │           │  └─ ProductRepository.java
      │           └─ service
      │              └─ ProductService.java
      └─ resources
         ├─ application.properties
         └─ static
            └─ index.html
Project files
pom.xml
This file contains the configuration and dependencies of the Maven project.
<?xml version="1.0" encoding="UTF-8"?>
<project xmlns="http://maven.apache.org/POM/4.0.0" xmlns:xsi="http://www.w3.org/2001/XMLSchema-instance"
	xsi:schemaLocation="http://maven.apache.org/POM/4.0.0 https://maven.apache.org/xsd/maven-4.0.0.xsd">
	<modelVersion>4.0.0</modelVersion>
	<groupId>com.stackpuz</groupId>
	<artifactId>example-crud</artifactId>
	<version>0.0.1-SNAPSHOT</version>
	<name>example-crud</name>
	<parent>
		<groupId>org.springframework.boot</groupId>
		<artifactId>spring-boot-starter-parent</artifactId>
		<version>3.0.10</version>
	</parent>
	<dependencies>
		<dependency>
			<groupId>org.springframework.boot</groupId>
			<artifactId>spring-boot-starter-web</artifactId>
		</dependency>
		<dependency>
			<groupId>org.springframework.boot</groupId>
			<artifactId>spring-boot-starter-data-jpa</artifactId>
		</dependency>
		<dependency>
	        <groupId>org.springframework.boot</groupId>
	        <artifactId>spring-boot-devtools</artifactId>
	    </dependency>
		<dependency>
			<groupId>mysql</groupId>
			<artifactId>mysql-connector-java</artifactId>
			<version>8.0.30</version>
		</dependency>
		<dependency>
			<groupId>org.projectlombok</groupId>
			<artifactId>lombok</artifactId>
		</dependency>
	</dependencies>
</project>
application.properties
This file contains the database configuration.
spring.datasource.url = jdbc:mysql://localhost/example
spring.datasource.username = root
spring.datasource.password =
spring.jpa.properties.hibernate.dialect = org.hibernate.dialect.MySQLDialect
App.java
This file is the main entry point for the Spring Boot application.
package com.stackpuz.example;

import org.springframework.boot.SpringApplication;
import org.springframework.boot.autoconfigure.SpringBootApplication;

@SpringBootApplication
public class App {
	public static void main(String[] args) {
		SpringApplication.run(App.class, args);
	}
}
ProductRepository.java
This file defines the product repository by utilizing the JpaRepository class, which implements the CRUD operations feature, so we can use it to perform any CRUD operations with less effort.
package com.stackpuz.example.repository;

import com.stackpuz.example.entity.Product;
import org.springframework.data.jpa.repository.JpaRepository;

public interface ProductRepository extends JpaRepository<Product, Integer> {

}
Product.java
This file defines the product entity that maps to our database table named "Product".
package com.stackpuz.example.entity;

import jakarta.persistence.Entity;
import jakarta.persistence.GeneratedValue;
import jakarta.persistence.*;
import lombok.Getter;
import lombok.NoArgsConstructor;
import lombok.Setter;

import java.math.BigDecimal;

@Entity
@Getter
@Setter
@NoArgsConstructor
public class Product {

    @Id
    @GeneratedValue(strategy=GenerationType.IDENTITY)
    private int id;
    private String name;
    private BigDecimal price;
}
We use the lombok library features to reduce the amount of code written for our entity by using @Getter @Setter @NoArgsConstructor
ProductService.java
This file is the Service Layer that contains your business logic and the data access operations. We define all CRUD methods here.
package com.stackpuz.example.service;

import com.stackpuz.example.entity.Product;
import com.stackpuz.example.repository.ProductRepository;
import org.springframework.beans.factory.annotation.Autowired;
import org.springframework.stereotype.Service;

import java.util.List;

@Service
public class ProductService {

    @Autowired
    private ProductRepository repository;

    public Product saveProduct(Product product) {
        return repository.save(product);
    }

    public List<Product> getProducts() {
        return repository.findAll();
    }

    public Product getProductById(int id) {
        return repository.findById(id).get();
    }

    public Product updateProduct(int id, Product product) {
        Product existing = repository.findById(id).get();
        existing.setName(product.getName());
        existing.setPrice(product.getPrice());
        return repository.save(existing);
    }

    public void deleteProduct(int id) {
        repository.deleteById(id);
    }
}
ProductController.java
This file defines all functions required to handle incoming requests and perform any CRUD operations.
package com.stackpuz.example.controller;

import com.stackpuz.example.entity.Product;
import com.stackpuz.example.service.ProductService;
import org.springframework.beans.factory.annotation.Autowired;
import org.springframework.web.bind.annotation.*;

import java.util.List;

@RestController
public class ProductController {

    @Autowired
    private ProductService service;

    @GetMapping("/api/products")
    public List<Product> getProducts() {
        return service.getProducts();
    }

    @GetMapping("/api/products/{id}")
    public Product getProduct(@PathVariable int id) {
        return service.getProductById(id);
    }

    @PostMapping("/api/products")
    public Product createProduct(@RequestBody Product product) {
        return service.saveProduct(product);
    }

    @PutMapping("/api/products/{id}")
    public Product updateProduct(@PathVariable int id, @RequestBody Product product) {
        return service.updateProduct(id, product);
    }

    @DeleteMapping("/api/products/{id}")
    public void deleteProduct(@PathVariable int id) {
        service.deleteProduct(id);
    }
}
We create routing URLs by using @GetMapping, @PostMapping, @PutMapping, @DeleteMapping annotations with the URL string as a parameter.@RequestBody parses the incoming request body as an entity object.@PathVariable maps a parameter from the URL.
We use ProductService to perform any CRUD operations.
index.html
This file will be used to create a basic user interface for testing our API.
<!DOCTYPE html>
<head>
    <style>
        li {
            margin-bottom: 5px;
        }
        textarea {
            width: 100%;
        }
    </style>
</head>
<body>
    <h1>Example CRUD</h1>
    <ul>
        <li><button onclick="getProducts()">Get Products</button></li>
        <li><button onclick="getProduct()">Get Product</button></li>
        <li><button onclick="createProduct()">Create Product</button></li>
        <li><button onclick="updateProduct()">Update Product</button></li>
        <li><button onclick="deleteProduct()">Delete Product</button></li>
    </ul>
    <textarea id="text_response" rows="20"></textarea>
    <script>
        function showResponse(res) {
            res.text().then(text => {
                let contentType = res.headers.get('content-type')
                if (contentType && contentType.startsWith('application/json')) {
                    text = JSON.stringify(JSON.parse(text), null, 4)
                }
                document.getElementById('text_response').innerHTML = text
            })
        }
        function getProducts() {
            fetch('/api/products').then(showResponse)
        }
        function getProduct() {
            let id = prompt('Input product id')
            fetch('/api/products/' + id).then(showResponse)
        }
        function createProduct() {
            let name = prompt('Input product name')
            let price = prompt('Input product price')
            fetch('/api/products', {
                method: 'POST',
                headers: {
                    'Content-Type': 'application/json'
                },
                body: JSON.stringify({ name, price })
            }).then(showResponse)
        }
        function updateProduct() {
            let id = prompt('Input product id to update')
            let name = prompt('Input new product name')
            let price = prompt('Input new product price')
            fetch('/api/products/' + id, {
                method: 'PUT',
                headers: {
                    'Content-Type': 'application/json'
                },
                body: JSON.stringify({ name, price })
            }).then(showResponse)
        }
        function deleteProduct() {
            let id = prompt('Input product id to delete')
            fetch('/api/products/' + id, {
                method: 'DELETE'
            }).then(showResponse)
        }
    </script>
</body>
</html>- Many other articles will use Postman as the HTTP client to test the API, but in this article, I will use JavaScript instead. This will help you understand more details when working with HTTP request on the client-side.
- To keep this file is clean and readable, we will only use basic HTML and JavaScript. There are no additional libraries such as the CSS Framework or Axios here.
- All CRUD functions will use the appropriate HTTP method to invoke the API.
showResponse(res)will format the JSON object to make it easier to read.
Run project
mvn spring-boot:runOpen the web browser and goto http://localhost:8080
Testing
Get All Products
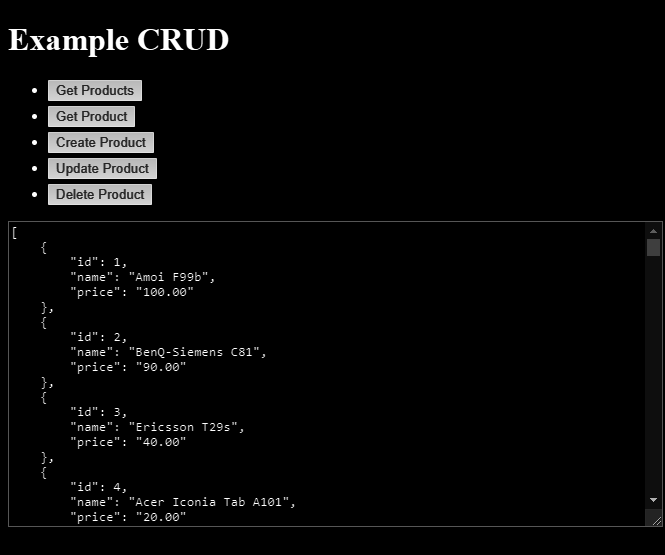
Click the "Get Products" button. The API will return all products data.

Get Product By Id
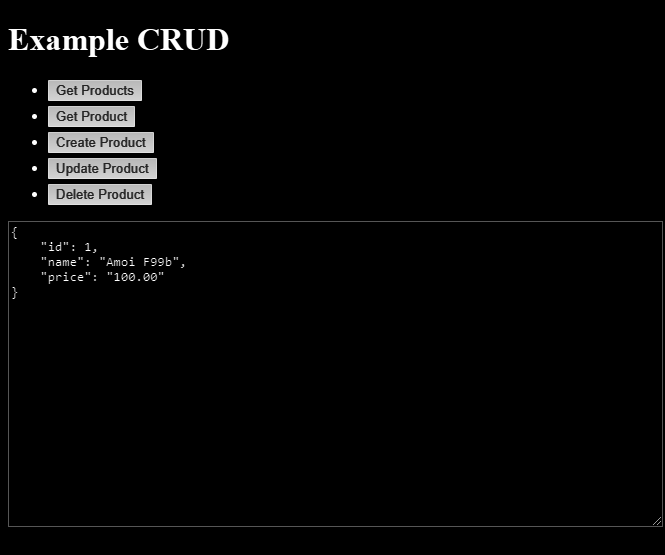
Click the "Get Product" button and enter "1" for the product id. The API will return a product data.

Create Product
Click the "Create Product" button and enter "test-create" for the product name and "100" for the price. The API will return a newly created product.

Update Product
Click the "Update Product" button and enter "101" for the product id and "test-update" for the name and "200" for the price. The API will return an updated product.

Delete Product
Click the "Delete Product" button and enter "101" for the product id. The API will return nothing, which is acceptable as we do not return anything from our API.

Conclusion
In this article, you have learned how to create and setup the Spring Boot application in order to create a CRUD API. Utilize the JpaRepository class as an ORM to perform the CRUD operations on the database. Test our API using JavaScript. I hope you will enjoy the article.
Source code: https://github.com/stackpuz/Example-CRUD-Spring-Boot-3
Create a CRUD Web App in Minutes: https://stackpuz.com


